All times are UTC


It is currently Thu May 02, 2024 7:09 am


Post new topic Reply to topic  [ 7 posts ] 
Author Message
 Post subject: Highlights.
PostPosted: Fri Jul 06, 2012 9:34 pm 
Kinsman
Kinsman
User avatar
Offline

Joined: Fri Apr 01, 2011 8:02 am
Posts: 218
Hi,
I'v been collecting and painting for just over a year now and have improved my painting skills yet I seem to struggle with highlights. So far my models are mainly washed and drybrushed to create depth. They look ok but I cant get the same smooth clean effect that can be achived by using highlights. I have tried highlighting a few times but it always looks to harsh, thick blobby lines on my models, rather than neat and fluid.
As i say, drybrushing looks ok but I would like to improve my skills.

Any advice?
Thanks.

_________________
Veni Vidi Vici
Top
  Profile  
Reply with quote  
 Post subject: Re: Highlights.
PostPosted: Fri Jul 06, 2012 9:49 pm 
Loremaster
Loremaster
User avatar
Offline

Joined: Sun Jun 10, 2012 8:52 pm
Posts: 1815
Images: 10
Perhaps try thinning the paint down a bit with water, i find this helps to give a smoother transition, this also helps to stop some of the thick blobyness that you talked about

when i highlight, I also find it helpful to drybrush a lighter colour on first to help me see where the bits to highlight are.
I hope this helps
good luck 8)

_________________
'Though my memory's fading, I remember two things very clearly: I am a great sinner and Christ is a great Savior'
-John Newton
Top
  Profile  
Reply with quote  
 Post subject: Re: Highlights.
PostPosted: Fri Jul 06, 2012 10:15 pm 
Ringwraith
Ringwraith
User avatar
Offline

Joined: Sun Nov 14, 2010 7:58 pm
Posts: 4932
Location: On the brink of madness.......
Images: 11
Stormcrow - SidtheSloths advice there is spot on!!! paint on the base colour of the cloak or whatever you are painting then add a little white or bleached bone to the base mix with a drop of water and when highlighting drag the brush towards the area you want the lighter colour to be strongest. Be careful not to get too much paint on the brush as it will run into the recess's of your model. You can repeat this stage as many times as you like until you are happy with the result. To blend even further you can water down the washes and do a watered down wash over the entire highlighted cloak which gives the recess's further depth. Again as Sid says do a light drybrush of the lighter colour before adding water to help you see where the highlights would be, the more you do it the less you will need to do the drybrush stage as you will know straight off where to highlight.

Good luck!

_________________
Commission Availability : BOOKED SOLID (again lol)

More of my work at

www.ShadowandFlame.co.uk
Top
  Profile  
Reply with quote  
 Post subject: Re: Highlights.
PostPosted: Fri Jul 06, 2012 10:23 pm 
Loremaster
Loremaster
User avatar
Offline

Joined: Sun Jun 10, 2012 8:52 pm
Posts: 1815
Images: 10
Thanks DMS
IMO bleached bone is better to add as skull white can leave it looking a bit washed out, but skull white also works well for different things

_________________
'Though my memory's fading, I remember two things very clearly: I am a great sinner and Christ is a great Savior'
-John Newton
Top
  Profile  
Reply with quote  
 Post subject: Re: Highlights.
PostPosted: Fri Jul 06, 2012 10:26 pm 
Kinsman
Kinsman
User avatar
Offline

Joined: Fri Apr 01, 2011 8:02 am
Posts: 218
Thanks guYs some good tips there.
I think ill try watering down my paints more, it may take a few more layers but I guess its worth it until i get a bit better at it.
Will also drybrush the area first too to help show detail.
Thanks again.

_________________
Veni Vidi Vici
Top
  Profile  
Reply with quote  
 Post subject: Re: Highlights.
PostPosted: Fri Jul 06, 2012 11:40 pm 
Kinsman
Kinsman
Offline

Joined: Fri Jan 19, 2007 7:13 pm
Posts: 227
Location: Portland Oregon
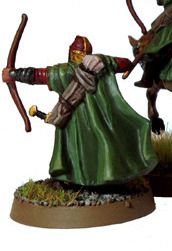
Here's an example of a cloak I did.
Image

Here's how it was done:
Image

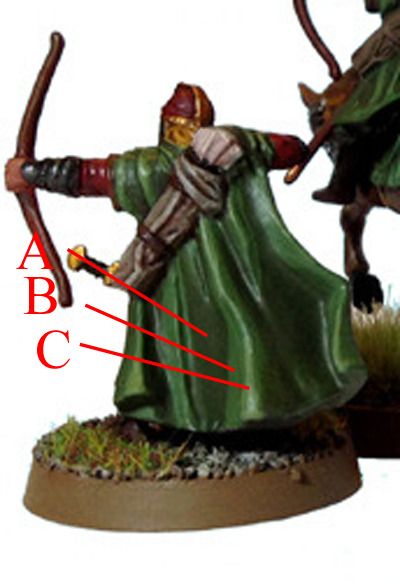
The whole cloak was covered in color A, then a good wide chunk of the raised sections were covered in B, then the top most ridge in C. I don't remember the names off hand (I'll have a look later on) but all three are straight out of the pot GW colors.

A is easy, just cover everything. To get a nice straight line for the edge of B, start the brush where you want it and apply the line in a single motion, that way you get a straight line. Making one smooth line may result in it not going exactly where you planned, but it doesn't matter too much because the boundaries between the colors are pretty arbitrary. C is a lot like drybrushing, you're just applying a line right along the ridge so if you align your brush perpendicular to the ridge and drift down the brush will hit the ridge before anything else and leave a bright line down the middle.

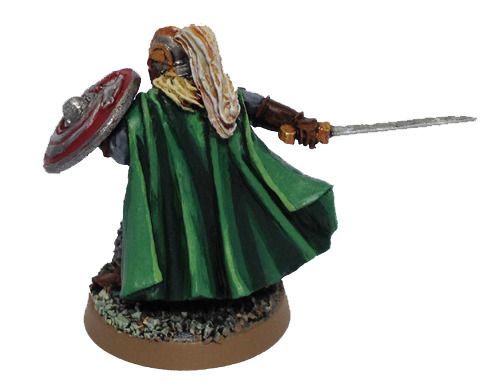
I you can't find three colors that work well together you can make your own. I do it by taking the darkest color, 2 parts of the dark plus 1 part bleached bone, and 1 part dark plus 2 parts bleached bone. That's where the stripes on Erkenbrand came from...

Image
Top
  Profile  
Reply with quote  
 Post subject: Re: Highlights.
PostPosted: Sun Jul 08, 2012 2:32 pm 
Kinsman
Kinsman
User avatar
Offline

Joined: Fri Apr 01, 2011 8:02 am
Posts: 218
Wow thanks for that.
The highlights look great and the guide really helps.
Thanks again.

_________________
Veni Vidi Vici
Top
  Profile  
Reply with quote  
Display posts from previous:  Sort by  
Post new topic Reply to topic  [ 7 posts ] 

All times are UTC


Who is online

Users browsing this forum: No registered users and 67 guests


You cannot post new topics in this forum
You cannot reply to topics in this forum
You cannot edit your posts in this forum
You cannot delete your posts in this forum
You cannot post attachments in this forum

Search for:
Jump to: