Making your own 3D Okko Board.

(
Credit: Laurent Pouchain, designer of the Okko Game)
Pretty nice, eh? Lets first find out what the hell
Okko even is.
Done? Ok lets proceed...
To me this board evokes a very minimalist thematic approach which is a hallmark of Shinto aesthetics.
Luckily, since this is an oriental themed game this approach works well.
For me to Poop on
This is what this article will be concentrating on.
A while back an article was printed in the French gaming magazine 'Ravage' issue #49 detailing how to make this board.
Here are the pages (originally posted on the Okko Blog):
Page#1 Page#2 Page#3 Page#4
Don't speak french? Yeah, I suck at it too. But luckily I can read enough to give a rough translation here (and to get me in trouble with french ladies) of what is going on and the pics, as they say, are worth a thousand words.
Its a pretty easy project all things considered for novice and advanced modelers alike. Fairly inexpensive as well in relation to other miniature wargame terrain tables. Expect about a week to complete if you pace yourself.
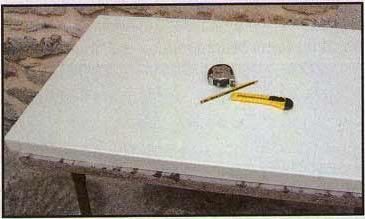
Materials you will need for the board itself:
* Metal yardstick and/or square
* Exacto knife with a couple brand new blades
* Gorilla glue
* Insulation foam sheet. (I used 3/4" but the article uses closer to 2" thick)
* Nail cleaner
* A rock with nice texture on it, like lava stone.
* Three colors of paint for the surface of the board ( I used Gladden house paint as an inexpensive way to cover such a large surface area. My color choices were: GLO30
fresh baked pumpernickel as the basecoat, GLN25
ground nutmeg as heavy drybrush over basecoat and GLN39 forest Khaki as a light drybrush highlight.
* 16 oz. kit of Envirotex resin (for water effect)
* A natural bristle brush to use for reeds (I used a product made the german company 'Busch' and is called 'grainfields and reeds')
* A frame if you want to get all fancy-pants.
All said and done this should cost you about $50 without the frame.
Step 1: Is bigger really better? Just ask my wife...
First thing you need to do is think about the area of the spaces on the board. The ravage article used 40mm spaces and for the most part this should work fine. However, I went with 2" spaces since I am basing the larger models on 50mm round bases (Oni Sumo, Oni Warau, etc.) and wanted to ensure these larger bases could be accommodated on the board. Though this does add 25% larger table area to the board so consider this part carefully.
Once you have committed to a space size, you must choose an insulation foam thickness. I used 3/4" pink insulation foam since I wanted a thinner board but this will be more work later so I recommend using 2" thick foam board if possible. It will be much more lighter and durable than using thinner foam board. I glued a piece of 3/16"th's masonite on the back of my board to prevent curling that happens when the foam is cut on one face. This worked great but was more work than was really needed when I could have just used a thicker foam sheet.
Step 2: 'Its hip to be square' if you beleive what Huey Lewis has to say...
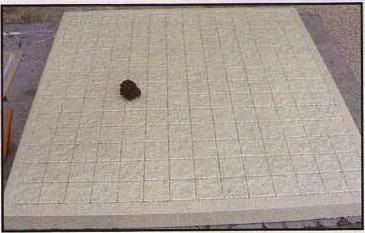
Next you will need to grab your yard stick and square and layout a 14x14 space grid for the board lightly in pen. Once this is laid out, you will go back with the yard stick and carefully and slowly cut a very shallow cut on the lines laid out in pen.
Once these shallow (roughly 3/16ths" deep) cuts have been made, you need to bevel the edges to clearly show where the spaces limits are once painted. A
nail cleaner or cuticle tool is about the best way to bevel them. Just insert the tip of the nail cleaner into the cut and slowly and lightly draw the tool down the cut until a groove is made down the line.
Acquiring this feminine piece of hygiene equipment is accomplished by having a significant other who is into cosmetology in someway. If you don't have a significant other who is an aesthetician, then it sucks to be you because they are HAWT. Procure one, STAT!

Failing this integral part of the process, just find something small and rounded that can do the job. The Ravage article suggests a pen and I tried that. Protip: It doesn't work very well.
Step 3: Can you smell what The Rock is cookin'?
This next step involves a rock. Of stone. The Ravage article uses a piece of Pine bark as shown below, but I think they have very effed up pine trees if France if their pine trees have bark like that.
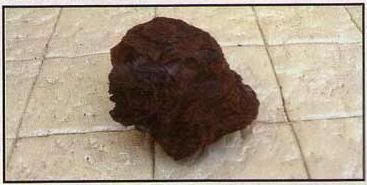
The trick here is texturing the surface a bit with the rock. I found the best way is to slowly rock the rock across the surface of the foam to give it texture, but hitting the foam with the stone could work ok as well though there is much less control with this method.
Go back over the lines with the nail cleaner as the bevel can be a bit obscured by the texturing of the surface with the stone. (insert fart joke here).
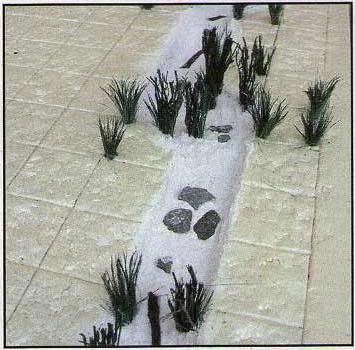
Step 4: Some say loooove, it is a riverrrrr....
You gotta have a creek, yo. Creeks be all zen, 'aight? Don't be clownin' and put a creek in yo okko board, yo!
Lay out how you want your creek to be on your board and then cut out the offending foam with malice. Careful malice.

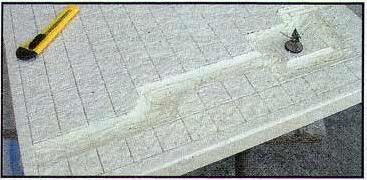
One you have the depth you wish go over the creek bottom with spackling to smooth over the rough knife marks left behind from your gangstuh style hack job. Throw in a few rocks and twigs for good measure to help with the look of the creek once you fill the ravine with resin 'water'.
 Step 5: "It's a small world, but I wouldn't want to have to paint it."
Its time for painting before we go any further.
I already gave my recipe for color scheme in the materials list but how I painted my board may not be to your own liking. Its okay if you don't like my choice in colors, even though you would be wrong for disliking it. One good rule to go by though is a strong contrast so that the colors 'pop'. A bit of color theory in that regard but lets suffice to say that a very dark base progressively getting lighter is the most dramatic and eye catching way to go. Stick with a dark base color, a medium mid tone and a light highlight and your choices should be safe.
Step 6: Follow the river and you will find...yo mama
Now for the creek bank reeds. You can cut small holes in the corners spaces of the spaces in order to allow the models to rest inside this difficult terrain. Add a few in the creek as well for a fuller effect while being sure to allow space for models to rest on the surface of the resin 'water' as well.
Inserting the brush bristles is a downright pain though. Best way I was able to handle it was to grab the amount I wanted to stuff in the hole as close to the base as I could and still have length to stick it in the hole (heh) and then dip into glue and stuff into the hole. After the first couple you get the hang of it though.
Step 7: Drown the witch!
Here is some tips from my experience in using this Envirotex stuff.
It says to 'stir vigorously'. If you think what they mean by vigorously is to stir it like you are making scrambled eggs while doing the 'la coocaracha' then you,like me, misunderstood the directions and the actual amount of stirring that is needed to properly mix this resin. Its just needs to be thoroughly mixed and avoiding bubbles is a good thing while doing this. You can tell its properly mixed when there is no longer any wispy cloudiness from the resins resisting being homogeneously mixed. It will be a consistent clear-ish color.
When I did it on the first layer pour I had so many bubbles it could have been mistaken for a milkshake. Spending the next hour with a straw blowing the tiny bubbles out of the resin was not pleasant at all.
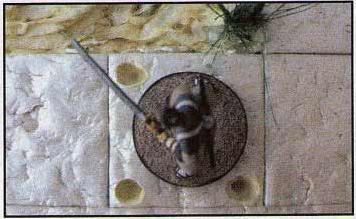
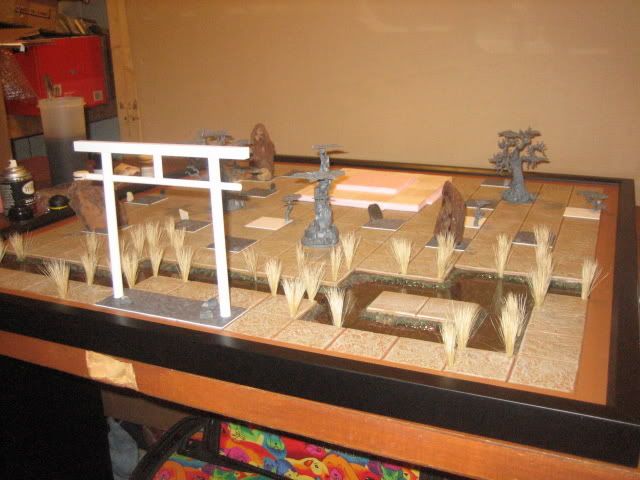
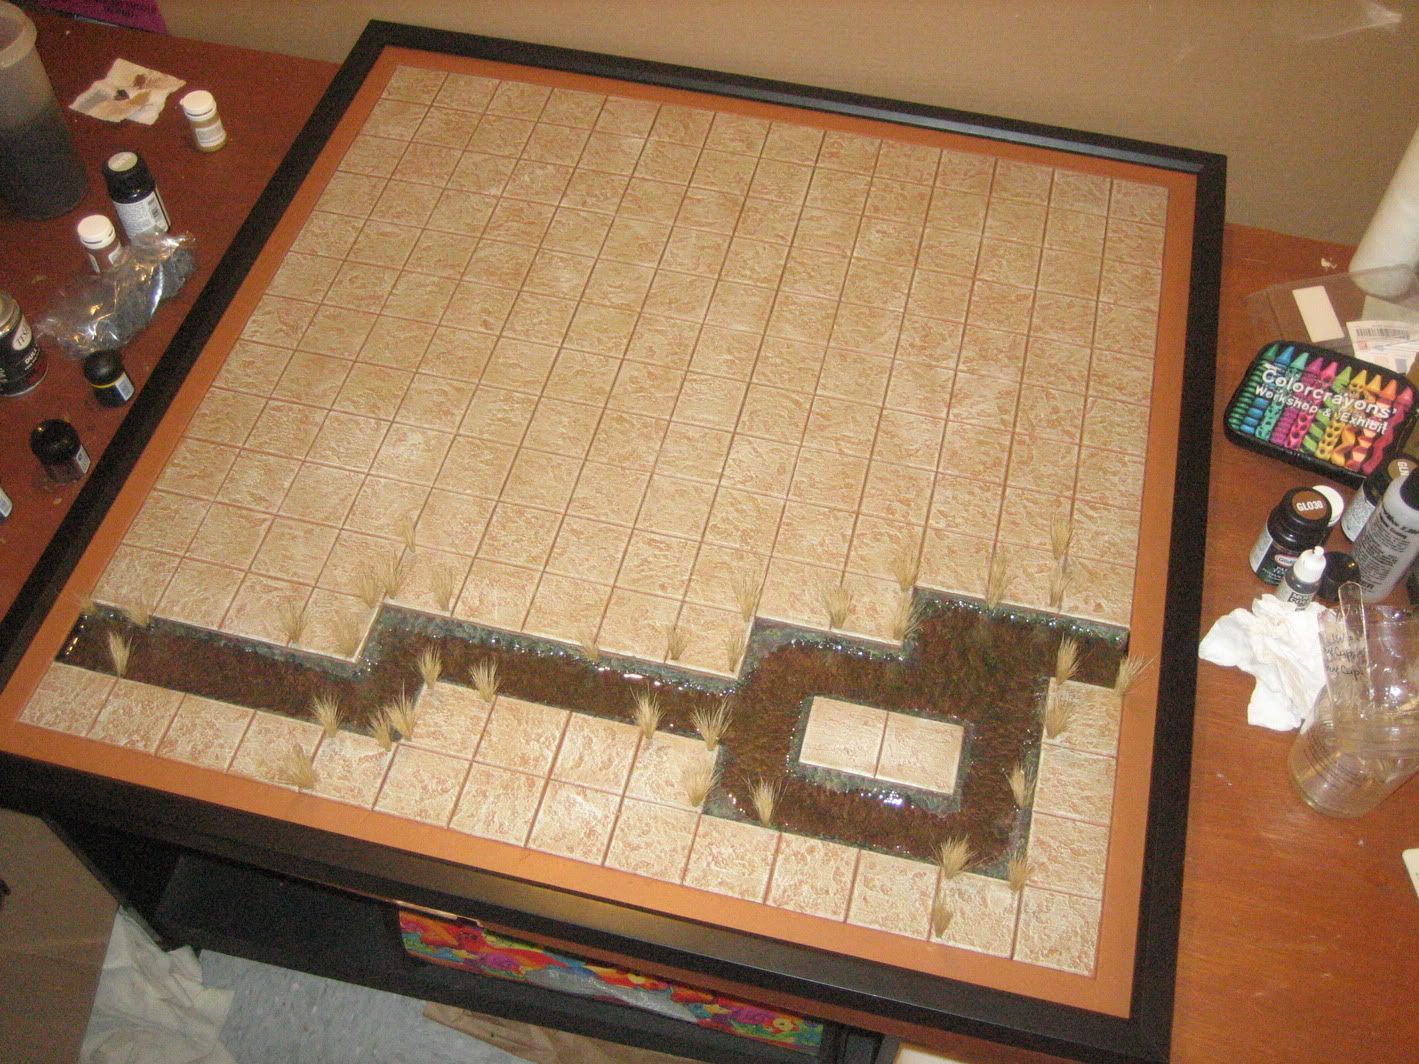
But once the resin cures after a couple days depending on temperature and humidity, this is what you'll end up with:
 (note the resin is only halfway filling the river as this pic was taken before the last layer of envirotex was applied...)
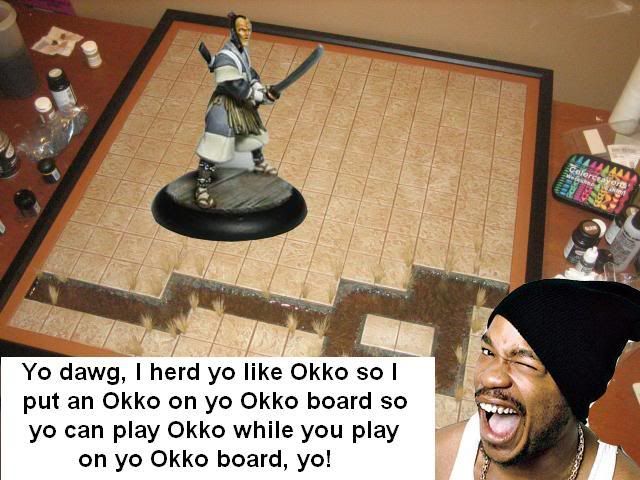
in order to properly celebrate the completion of the board itself, you cant have a pimped out game without Xzibit commenting on it
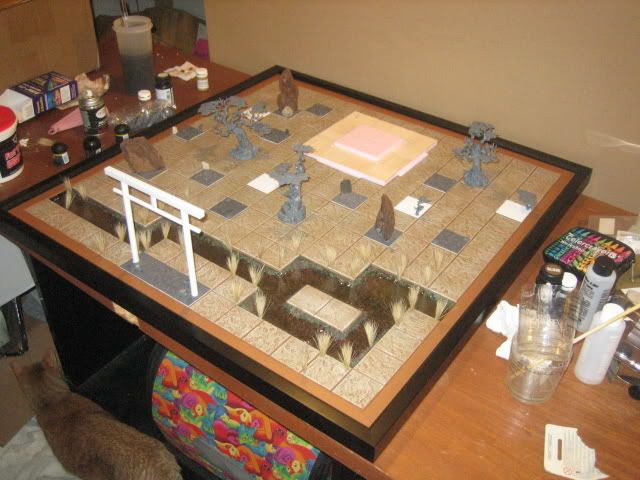
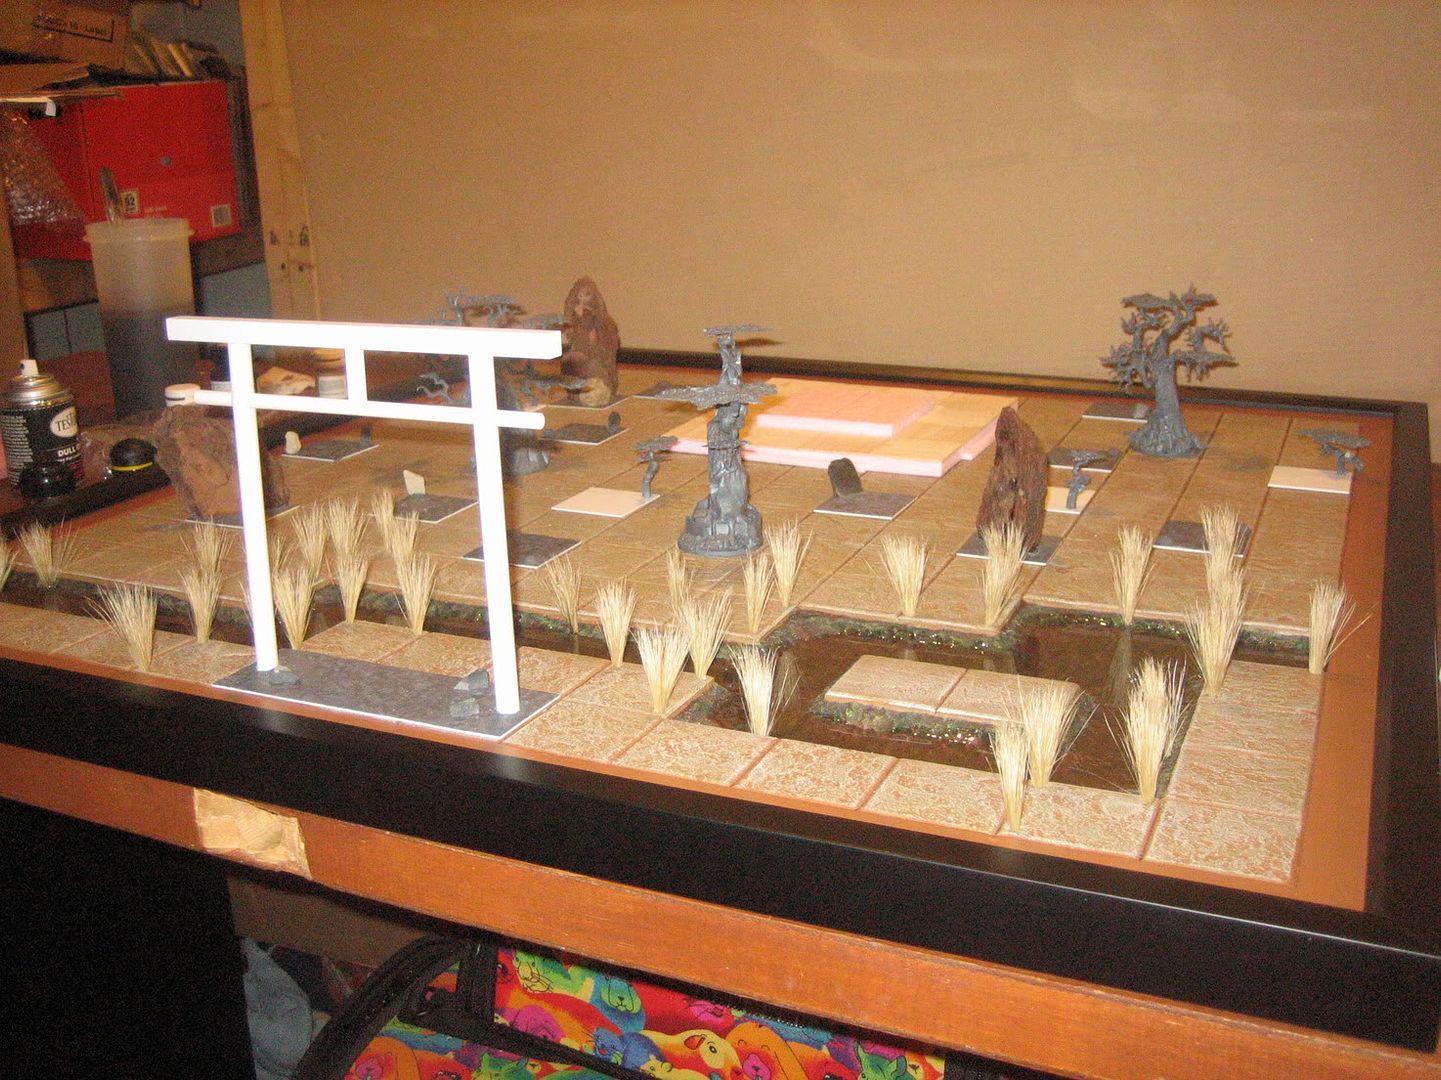
 Step 8: The board terrain...to be continued
Next is to finish the rest of the terrain elements on the board. Only have to texture the bases with bushes on them along with finishing the shrine structure in the middle of the board and then its time to paint. But that will be the next update to this thread once they are done...
 Top
Top


 looks fun to play on a board like that.